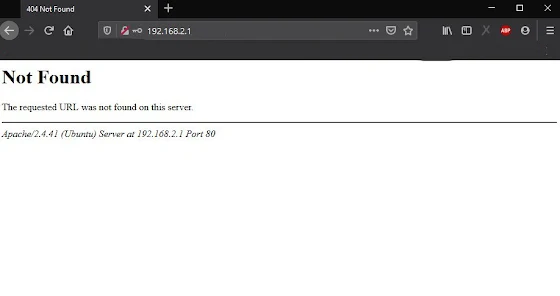
Cara Mengaktifkan Apache Mod_Rewrite di Ubuntu Server 20.04

Picture by : # • Post by : Admin@wirneet
Mod_rewrite adalah salah satu modul Apache yang sangat powerful untuk memanipulasi URL, kebutuhan ini dapat digunakan pada .htaccess pada sebuah web server, secara default Apache tidak mengaktiftkan mod_rewrite, sehingga kita harus melakukan beberapa ubahan agar web yang kita bangun berjalan sesuai dengan yang kita inginkan.
Modul mod_rewrite memudahkan kita untuk menyesuaikan url pada sebuah website, agar url yang digunakan terlihat rapi, bersih dan SEO friendly.
Berikut dibawah ini, cara bagaimana mengaktifkan modul mod_rewrite Apache di Ubuntu Server 20.04
1. Aktifkan Mod_Rewrite
Pertama sekali, silakan buka terminal, kemudian aktifkan mod_rewrite seperti dibawah ini.
$ sudo a2enmod rewrite
Selanjutnya Anda harus melakukan restart servis apache
$ sudo /etc/init.d/apache2 restart
Maka sekarang apache yang digunakan sudah aktif untuk menerima rewrite
2. Konfigurasi Site Enable
Step selanjutnya adalah melakukan ubahan pada site-enable pada Apache, agar bisa melakukan URL rewrite yang di jalankan oleh .htaccess
$ sudo nano etc/apache2/site-enabled/000-default.conf
Dibawah ini adalah default isi dari 000-default.conf Apache di Ubuntuk Server 20.04
<VirtualHost *:80>
        # The ServerName directive sets the request scheme, hostname and port that
        # the server uses to identify itself. This is used when creating
        # redirection URLs. In the context of virtual hosts, the ServerName
        # specifies what hostname must appear in the request's Host: header to
        # match this virtual host. For the default virtual host (this file) this
        # value is not decisive as it is used as a last resort host regardless.
        # However, you must set it for any further virtual host explicitly.
        #ServerName www.example.com

        ServerAdmin webmaster@localhost
        DocumentRoot /var/www/html

        # Available loglevels: trace8, ..., trace1, debug, info, notice, warn,
        # error, crit, alert, emerg.
        # It is also possible to configure the loglevel for particular
        # modules, e.g.
        #LogLevel info ssl:warn

        ErrorLog ${APACHE_LOG_DIR}/error.log
        CustomLog ${APACHE_LOG_DIR}/access.log combined

        # For most configuration files from conf-available/, which are
        # enabled or disabled at a global level, it is possible to
        # include a line for only one particular virtual host. For example the
        # following line enables the CGI configuration for this host only
        # after it has been globally disabled with "a2disconf".
        #Include conf-available/serve-cgi-bin.conf

</VirtualHost>
Kemudian silakan tambahkan permission direktori pada /var/www/html dibawah ini.
<Directory /var/www/html>
                Options Indexes FollowSymLinks MultiViews
                AllowOverride All
                Order allow,deny
                allow from all
</Directory>
Setelah di tambahkan kode permission diatas, maka akan menjadi seperti dibawah ini.
<VirtualHost *:80>
        # The ServerName directive sets the request scheme, hostname and port that
        # the server uses to identify itself. This is used when creating
        # redirection URLs. In the context of virtual hosts, the ServerName
        # specifies what hostname must appear in the request's Host: header to
        # match this virtual host. For the default virtual host (this file) this
        # value is not decisive as it is used as a last resort host regardless.
        # However, you must set it for any further virtual host explicitly.
        #ServerName www.example.com

        ServerAdmin webmaster@localhost
        DocumentRoot /var/www/html

        # Available loglevels: trace8, ..., trace1, debug, info, notice, warn,
        # error, crit, alert, emerg.
        # It is also possible to configure the loglevel for particular
        # modules, e.g.
        #LogLevel info ssl:warn

        ErrorLog ${APACHE_LOG_DIR}/error.log
        CustomLog ${APACHE_LOG_DIR}/access.log combined

        # For most configuration files from conf-available/, which are
        # enabled or disabled at a global level, it is possible to
        # include a line for only one particular virtual host. For example the
        # following line enables the CGI configuration for this host only
        # after it has been globally disabled with "a2disconf".
        #Include conf-available/serve-cgi-bin.conf

        <Directory /var/www/html>
                        Options Indexes FollowSymLinks MultiViews
                        AllowOverride All
                        Order allow,deny
                        allow from all
        </Directory>

</VirtualHost>
Setelah itu simpan dengan menekan tombol keluar Ctrl + x, untuk menyimpan tekan tombol Y (Yes), kemudian silakan restart apache web server.
$ sudo /etc/init.d/apache2 restart
3. Buat .htaccess Sederhana
Silakan buat file .htaccess sederhana, untuk menguji modul mod_rewrite di Apachenya berjalan atau tidak.
<IfModule mod_rewrite.c>
RewriteEngine on

RewriteRule ^kontak$ kontak.html [L]
</IfModule>
Kemudian simpan di folder var/www/html projek atau latihan Anda.
Selanjutnya silakan buat file kontak.html, kemudian simpan di var/www/html, lalu panggil url http://ipaddress/kontak atau menggunakan http://localhost/kontak, jika menggunakan root folder di dalam var/www/html/nama_folder silakan saja tambakan setelah localhost atau ipaddressnya.
Demikian tutorial ini kami bagikan, Terima kasih telah berkunjung di artikel kami, Semoga bermanfaat


Ada 0 Komentar di "Cara Mengaktifkan Apache Mod_Rewrite di Ubuntu Server 20.04"
Tinggalkan Komentar Disini